Showing posts with label Non-Food. Show all posts

Sunday, July 28, 2013

Flubber or Gak or Flarp, it goes by many names!

I saw this recipe floating around and I remember making it as a kid. I thought it would be a good afternoon project for my boys.
There is some debate about the safety of borax..... I have used it and never had an issue. Just wash your hands and supervise any kid that might try to eat it!


2-4 oz bottles school glue(I used the cheap Rose Art stuff)
1/2 cup cold water
food coloring as desired

1 tsp borax powder
1/2 cup warm water


In a bowl mix the glue, cold water and food coloring.


In a measuring cup mix the borax and water until it is fully dissolved.


Pour the borax mix into the glue mix and stir well.


Keep stirring until it holds together well. Drain off any excess liquid.


I let it rest for 10-20 minutes and pour off any remaining liquid.....


Play away!!!


Monday, July 8, 2013

Homemade A/C Unit

I live in western Washington State so while Air Conditioning is nice on occasion, the need is not like it is say in southern states.  I just never could justify the cost. When I saw this floating around I just couldn't help giving it a try. It is not pretty but it is awesome!! I already had the tote, but the pipe and the fan were less than $10 and it was easy to collect the gallon jugs.
 Of course this is not going to keep a really large space cool in desert heat or anything like that and you need to have some freezer space(we have a big deep freeze so no issue for us, it actually helps to make the freezer more efficient if we fill excess space with the jugs LOL) but it is great in a pinch and a fun project.


1- 16-18 gallon tote with lid
1- 90 degree PVC elbow....I used this one I liked the bigger end to keep it in place
1- 6-8 inch electric fan(preferably 2 speed)
6 gallon jugs--- I like the "square" kind, I know that is not available everywhere though, just get as many as you can fit in your tote.......I also have a "backup" set too, so I can refreeze easier. You could use 2 liter bottles too, whatever is handy.


Exact-O knife
Duct Tape
Spray Paint....ok not a need, but it makes it a little better LOL..

Fill your jugs with water to 1 inch before full and freeze at least 24 hours.


Trace a circle around the smaller end of the PVC elbow on the top right side of the tote lid.
For the fan I took off the front grate and traced that kitty corner from the PVC pipe.

Carefully cut your circles out, you want a somewhat tight fit. I used a dremel to finish off the edges a little.

Fit the pipe up through the bottom of the lid(the wider side will be under the lid) and secure with duct tape.

Spray Paint as you see fit.


Place your frozen jugs in the tote, secure the lid and secure the fan into the remaining hole.
Plug your fan in and DONE!


Wednesday, April 17, 2013

Bubble Time!!

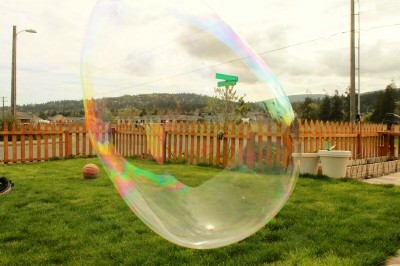
Spring is finally making a little appearance....for how long? Who really knows, but I decided to make the best of it and make GIANT bubbles. I have yet to find a PERFECT bubble mix, but this one is good for some entertainment.


Bubble Wand:

2 - 24 inch pieces of wood....dowels, scrap wood, whatever you have that can easily be held by little hands. I found 2 pieces of scrap wood and painted them.

2 - 1 inch wood screws

2 pieces of strong cotton string*
Length is up to you but make 1 about 33% longer than the other. I did 45 inches and about 60 inches. Longer the strings, the larger the bubbles.

*I found some sting at goodwill and braided it into a 3 layer piece to strengthen it.

4 small metal washers


Screw the screws into the ends of the wooden pieces, leaving about 1/4 inch of the head out. Make sure you sand down that side....unlike my photo LOL...


Tie the ends of the short string tightly to the screw on each of  wood pieces.


Tie 1 end of the longer string onto 1 screw.

Thread the washers onto the string, then tie the end to the other screw.


Bubbles:

In a large bucket mix 1- 16 oz bottle light corn syrup with 10 cups distilled water  Mix it WELL here.
For even stronger bubbles, mix in 1/4-1/2 cup liquid glycerin.


GENTLY stir in 1-30 oz  bottle QUALITY liquid dish soap(some people have a brand preference, I think all that REALLY matters is that its not a watery store brand and make make sure it doesn't have any extras, like bleach.)

 GENTLE GENTLE GENTLE, you want to make as little foam as possible during this process.

For best results let it sit, covered, overnight but if you are really anxious you can use it in as little as 2 hours.


Dip your wand into the bubble solution.


Pull it out and open it up, then wave it around gently to make some SUPER bubbles!!!


Sunday, January 20, 2013

Cough, Cold and Flu Soother

I can't quite sell it as a "remedy" but a number of sources do say the ingredients shorten Cold and Flu symptoms. It certainly helps us! I make up a batch of this at the first sign of winter time sniffles.


1/4 cup honey
1/4 cup apple cider vinegar(raw is best!)
1/4 cup hot water
1 TB fresh grated ginger (1 tsp ground ginger if fresh isn't available)
1 tsp cinnamon(fresh ground if possible)
1 /2 tsp ground cayenne pepper

2014---this year I doubled the batch and added a clove of garlic, then put it all in my vitamix so there were no chunks...I was worried that the garlic would not mesh well but all the other flavors really hid the garlic!


Mix all the ingredients in a jar with a tight lid, shake well to incorporate all the ingredients.

You can take it straight by the tablespoonful as often as you need
Mix it into hot water and sip it as tea
Add some Irish Flu remedy like Whiskey (or Brandy is fantastic too!) for a good nights sleep(obviously the latter is not appropriate for the kiddos, but its mommy's favorite LOL)

Wednesday, May 30, 2012

I'm Bored Jar

Summer time is almost here. My boys are notorious for the "I'm Bored" whines! This year I am prepared, and I found an excellent use for the urn our poor old Bronte dog came home in..(dont worry there is no ash residue in there, he was inside a plastic bag and we put him in a special garden we made for him)

I printed out little slips of paper each with a chore, task, game or treat. When they are bored they have to take a slip and they MUST do what is listed. (For at least 30 minutes or until completed)

Need some ideas? I got a fantastic list here and/or create your own for age appropriate tasks for your kids.


My Rules:


When you tell mom
that you are bored
you MUST reach in
and select a task.
It could be boring
or it could be a blast!
You HAVE to do the task I insist,
NO whining or you get
an automatic CHORE from the list.


I created a long chore list of simple household chores for them to select from when they whine about what they got!


I also added treat ones like 30 minutes of Wii , TV or Computer time(usually an earned item) and going out for ice cream or to the park.(they know leaving the house ones are time permitting, but I give an IOU and select again if we cant do it right away)


You can add in any special treat you like!


Tuesday, February 7, 2012

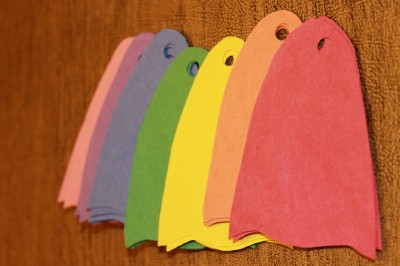
Super Hero Valentines - Caped Cru-Suckers

So CUTE!! I didn't want to do mainstream cartoon Valentines with my kids for their classes this year and I am not super creative when it comes to crafts. So I looked around and found these. They turned out AWESOME!!!


Materials:
-Construction Paper of your color preference(I used the rainbow: red, orange, yellow , green, blue, purple and pink) Number of sheets depends on how many you need of course, I folded each paper sheet into quarters for 4 valentines per sheet, if you want to cut out individually you can probably get plenty more per sheet....I just went the "lazy" route LOL
-glue stick
-tootise pops
-hole punch
-black marker
-tape
-scissors


Here is the template for the capes and masks, I would suggest printing it out on card stock, makes it MUCH easier to trace, but I did it with regular paper.
LINK

Trace and cut your number of capes and masks.
Punch a hole at the top of each cape


Draw eye holes on the masks with the black marker.


You can write a message on each cape but I chose(again a "lazy" route) to use a template from Avery labels.
You can customize with whatever message and even Valentine Icons(go to "Images from Avery Gallery" and select Valentine) and print them out(on regular paper or construction paper if you like). Then just cut them out and paste them on!

LINK to the Avery template that I used.


I actually put the "Love Marshall" on my youngest sons label, I still had him sign them but his handwriting leaves something to be desired LOL I had my older sons fill out the to and from on the backs of the cape.


Take the masks and place them around the tootise pop, securing at the back with a small piece of tape.

Insert pops into the capes pressing up over the wrapper and securing with a bit of tape.


Monday, September 12, 2011

Easy Shampoo and Conditioner

This is so simple, no chemicals and leaves your hair clean, soft and shiny!!

Note...some people go through a period of adjustment when starting this! Your hair might feel greasy( for me it didnt LOOK greasy, just felt it) It only lasts a short time if you keep it up.


You can adjust for long , short, thick or thin hair, mine is about shoulder length, about medium thickness and this was just right for me

Shampoo:
1 cup warm water
2 TB baking soda
Mix well until the baking soda is dissolved


Pour over dampened hair and rub in scalp to tips, like regular shampoo

Rinse well.


Conditioner:
Again adjust to your length

1 cup warm water
2 TB apple cider vinegar
(you can use white vinegar if you like)

Combine well and pour over shampooed hair(careful to not get it in your eyes) rub in well and let it sit 1 minute.

Rinse very well

dry and style as usual


This is a nice chemical free(and cheap!) way to get clean, soft and shiny hair! My hair is color treated and I have had no issue with color running or fading at all.


you can mix up bigger batches if you like to store it in an old bottle!

Saturday, January 8, 2011

Fabric Refresher

My own concoction for homemade Febreeze. You can find a wide variety of scented room sprays in the candle department at Walmart or Target or you can use essential oils.
REMEMBER TO TEST YOUR FABRIC FIRST!!! I have not had any spotting or staining issues on anything I have sprayed it on but its best to be cautious when using any type of spray.


1/2 cup white vinegar(kills odors)
1/2 cup clear rubbing alcohol(helps it dry faster)
1/4 cup hydrogen peroxide(kills bacteria)
2 cups water
1/4 cup (or more for heavier scent) scented room spray
** or 20-40 drops essential oils(more or less for your scent preference)


Combine all in a large spray bottle, shake gently before each use.


Tuesday, September 14, 2010

Play Dough

What mommy doesnt love playdough right?? A few cents and 10 minutes and hours of entertainment!!!


Classic PlayDough
1 cup flour
1/2 cup salt
2 tsp cream of tartar
1 tsp oil
1 cup water
food coloring


Combine first all ingredient in a medium size pot


 mix mix mix until it is just slightly lumpy and your color is even.....add more coloring to suit your style.


Turn on the heat to medium and stir constantly until it comes together in a ball(about 4-5 minutes)


Turn it out of the pan and knead a few times and there you go!!!


Allow to cool before giving it to your kids of course!!


Alternately you can do a BIG batch by double or tripling the ingredients and omitting the food coloring, then divide as you wish and knead food coloring into each ball...
I prefer to put the food coloring in the mix to avoid hand and counter staining.

Store tightly sealed in plastic ziplock bags!